This is a nice, simple technique you can use to draw a
canine's head from a side view.
Basically, simple shapes are drawn as place holders before
the image is created. Details are added in relation to the
place holders, leaving you with a finished sketch.
 |
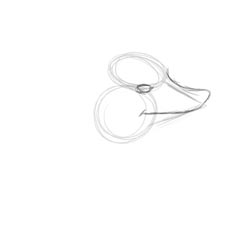
1) The first step is to draw
a circle. It represents the jaw. |
 |
2) Draw a small slanted oval
for the forhead and brow. It should be slightly tilted
downwards. |
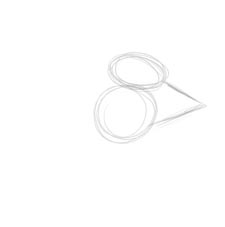 |
3) Draw a triangle for
the snout.
That's it for the skeleton! This walkthrough shows
you how to make a wolf, but you can use this skeleton
to create almost any creature with a long face, beak,
or snout. Using shapes, it's easy to position the
head however you like, without needing to look at
a reference photo of the subject.

|
 |
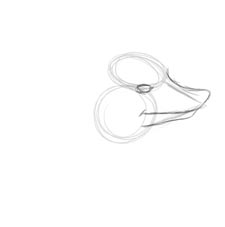
Now for the details and
skin.
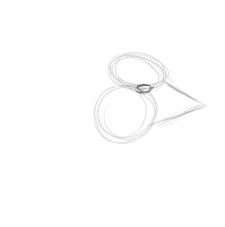
1) Give him an eye. It should be below the brow (the
upper oval). |
 |
2) The snout
starts at the end of the oval curving downwards and
then upwards just above the point of the triangle, leaving
a gap between the two points. |
 |
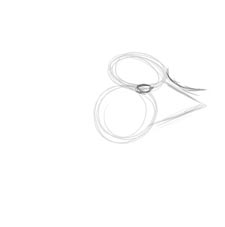
3) Connect these two points
with one curving line to create the nose. |
 |
4) The mouth is a line starting
at the bottom of the nose leading straight back towards
the eye. |
 |
5) The chin or jaw starts
at the base of the mouth and leads into the circle. |
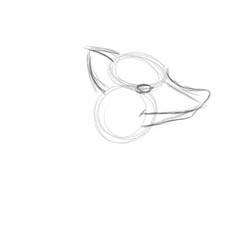 |
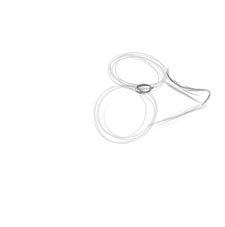
6) The ear is created with
two strokes. One starts at the middle of the upper oval
and goes upwards to create the point of the ear and
then curves downwards to meet the circle. The second
stroke begins at the top of the upper oval and goes
upwards to meet the top of the ear. |
 |
7) Now that it looks more
like a canine, you can give it some fur. I'll domonstrate
some shaggy facial fur, since this is a wolf tutorial.
Give it some facial fur starting at the back tip of
the eye. Curve it downwards and then, keeping the jagged
"fur flow" in the same direction, continue
it to the jaw. |
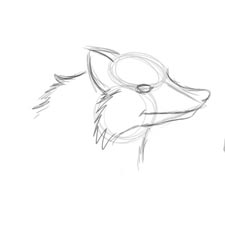 |
8)The top of its neck starts
from the middle of the top oval and the bottom continues
from the jaw. |
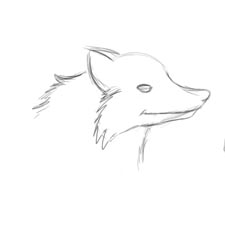 |
9) Erase the circle guides
and you're done! |