| |
|
|
How To Shade
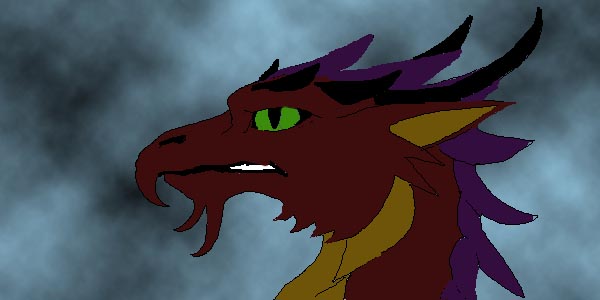
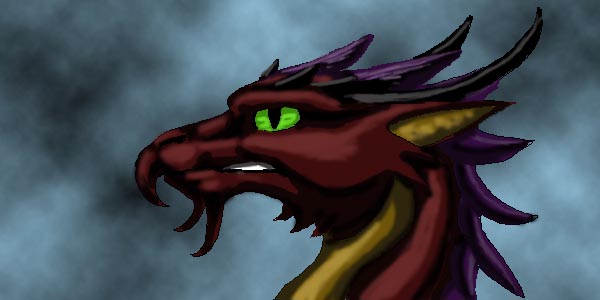
A Dragon Drawing 1) First, get a dragon drawing. Here's a simple block colored dragon head - you can use this dragon if you want, and you don't yet know how to draw a dragon head. Getting forms down will be my next tutorial. If you already know how to draw dragons, I figured you'd know how to fill in rough shapes in your drawings with the flood fill tool of whatever drawing program you use.
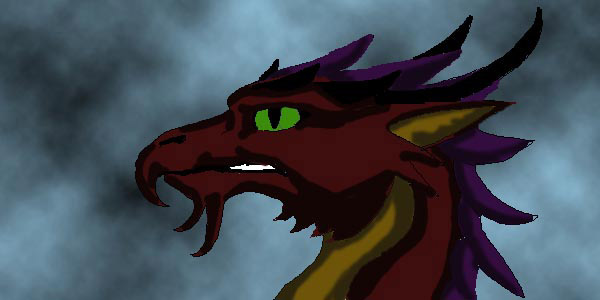
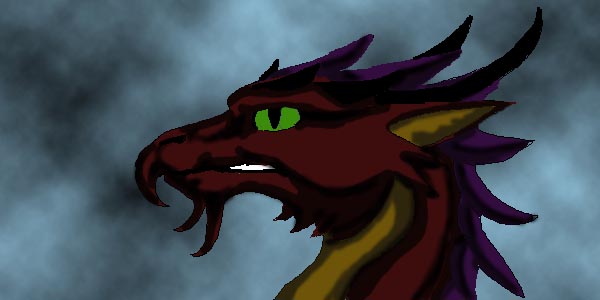
A little more exciting, eh? Let's get started! On to Stage 2 -> Edge Shadows
Black Shadows
Highlighting! 4) Okay...here's where things start to get really fun. As you can see, I've used a light pinkish red on the red areas, highlighting the upper and left parts of each of the large red areas. I use a light gold on the belly scales, and mottled gold in the ears (which will eventually have ear hair in them). I've started adding detail with the light purple, but only the neck shields that are being struck with the light from the left. For the sheilds that are in shadow (on the back of the neck below the horns), they'll be 'backlit' with ambient light, which is also a lot of fun to do. To do these first hightlight areas, I used the airbrush tool at 60%, but you can use the paintbrush tool, or even the pencil. I like the soft edge that the airbrush tool gives me in photoshop. For the large red areas, I used a fairly large fuzzy edged brush. For the horns and shields, I used my airbrush set on the smallest brush at about 80%. Experiment to see which brushes you like to use best.
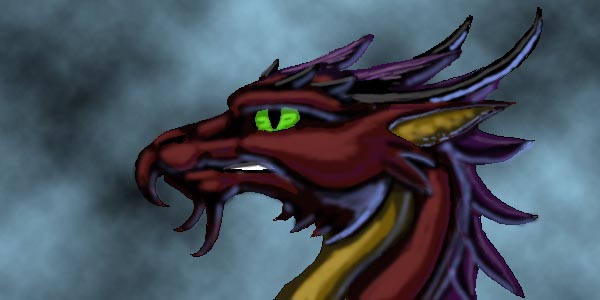
Adding Interest 5) Oops..I missed a step. If you look very closely along the cheek of the subject, you'll see a purple stripe above the black areas that separates the dark red from the lighter base red. I added this between the very light pink and the black just to add even more interest to the form. If this dimar was more reflective, and had metallic scales, I'd add even more colors to simulate the reflection of items around him in the scales. But, his scales are fairly matt, so I've just added the purple. Ambient Light 6) For this piece, I chose to use a blue light rising up from the lower right hand corner of the picture. Like an opposite highlight, I touch the blue to any part of the subject that's in shadow. Since the horns are smoother, and more reflective, I've used a much stronger light blue to show that they're reflecting more light. You can see how even this beginning backlighting step brings the dimar more into 3D.
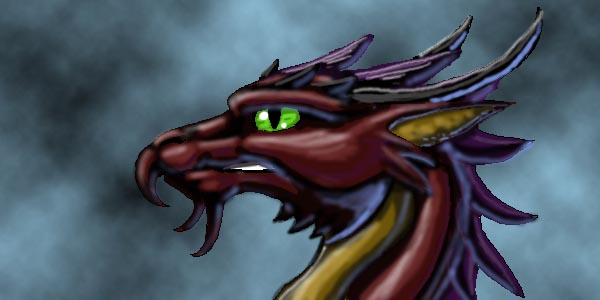
Strengthening Highlights 7) In this stage, I return to highlighting from the upper left hand corner of the picture. Using my airbrush tool, with a pure white set at 30%, I highlight areas I previously highlighted with the light pink. Since this highlight is more intense, it shouldn't completely cover the light pink areas, but just accent them. The highlights don't have to be flat areas of color - you can see on his cheek, which is a large flat area of the picture, I've used three separate lines of white highlight below the eye to give the cheek some texture. By strengthening the light highlights, you offset the intensity of the backlighting, and increase the contrast of the whole picture. By working from black (boarders) to white (highlights) with lots of intense color between, you bring the subject forward. I have a pretty loud background for this picture, and at the beginning, you can see that he kind of faded into the clouds. But now, he jumps out quite a bit more.
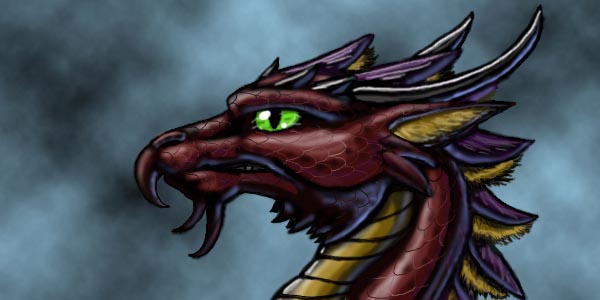
Cleanup and More Detailing 8) If you look at the last lesson, the whole piece is still rough, and kind of messy. Using the black airbrush tool, I've added a border all the way around each shape in the picture. This just helps the form separate from the background more. You don't need to use black for this - a dark version of the color can do. And, you don't have to outline the whole form. Often, if your background is fairly dark, you can have the highlight define the outer edge of the form. A strong black outline like I have here often makes the piece seem a bit cartoonish, but it's an easy technique to get really striking results. And I love cartoons anyway, so I like it. If you really want to get extremely realistic lighting, you need to study objects and animals that have the lighting, colors and textures you want for your piece. There's NO substitute for studying real objects when you draw! :-) I have even gone as far as sculpting dragon heads and lighting them to get forms right, or drawing my cats and 'morphing' them into dragons in a series of sketches. I've also added a deep golden mane to this dimar. I felt the neck was a little boring. Unlike reptiles or traditional earth dragons, Dimar are more mammalian, and all have hair. In the case of the war breed, as shown here, their manes often tuft out under their neck shields. I've darkened the teeth, because they stood out too much outlined in black, and would be in shadow with the lighting I'm using for this picture. I know this from my experiences drawing from my sculptures - again, there's no substitute for studying a 3D object...
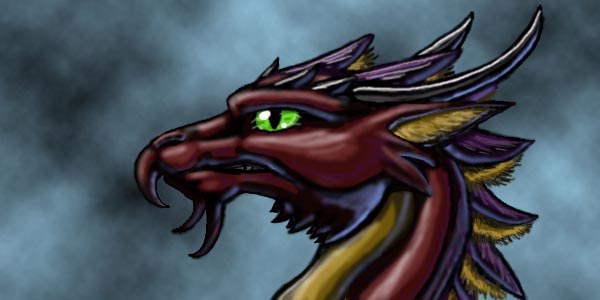
Scaling and Fine Detail 9) Since I know most folks reading this tutorial are going to be wanting to know how to draw traditional Earth dragons, I've added tightly meshed scales to this subject. To make scales, I use the Photoshop smude tool (looks like a little hand with the index finger out) at pressure 85% on the finest brush setting. Working from a medium dark or dark area, I draw scales on all the lighter parts of the form. In places where I feel the texture of scales would be visible in the dark areas (like the lower part of the jaw that's backlit in blue) I also draw in scales. I used the dark red color we used at Stage 2 to create mottles on the scales. This helps them separate from the form of the dragon a little, without obscuring his real shape. That's the hard part about scales; I tend to get obsessed with the lighting and shadow of each scale, which causes them to overwhelm the whole picture, to the point where it can hardly look like anything anymore. I draw scales flowing from the nose, down the spine to the end of the tail. I used to own goldfish and I drew them often, and this is where I learned about scaling, but you can probably find some photographs of fish, snakes or other scaled animals to study. For the belly, I've used a simple snake belly pattern. I could probably detail it even more, but I'm happy with this piece the way it is. I could fiddle with my drawings forever, but often I force myself to call it quits and move on just so I don't ruin them. :-) I have 'fixed paintings until they broke' many times in the past. If you have this tendency, save backups and multiple versions of your pieces often! I've used some more light purple to highlight the neck sheilds, and to create a satiny texture to the mane, I've worked from black to the darkest brown on the neck scales, to the next darkest, to the dark gold, to the light gold. I wanted the mane to match the neck, so I selected the colors from the neck with my eye dropper for the mane. TADAAA! All done! Did this tutorial help you? Email my husband and let me know! Feel free to include any URLs to drawings you've used this technique on, and I'll add a link to your page from mine.
Credits: |
